1. Open it and read the KPI cards first
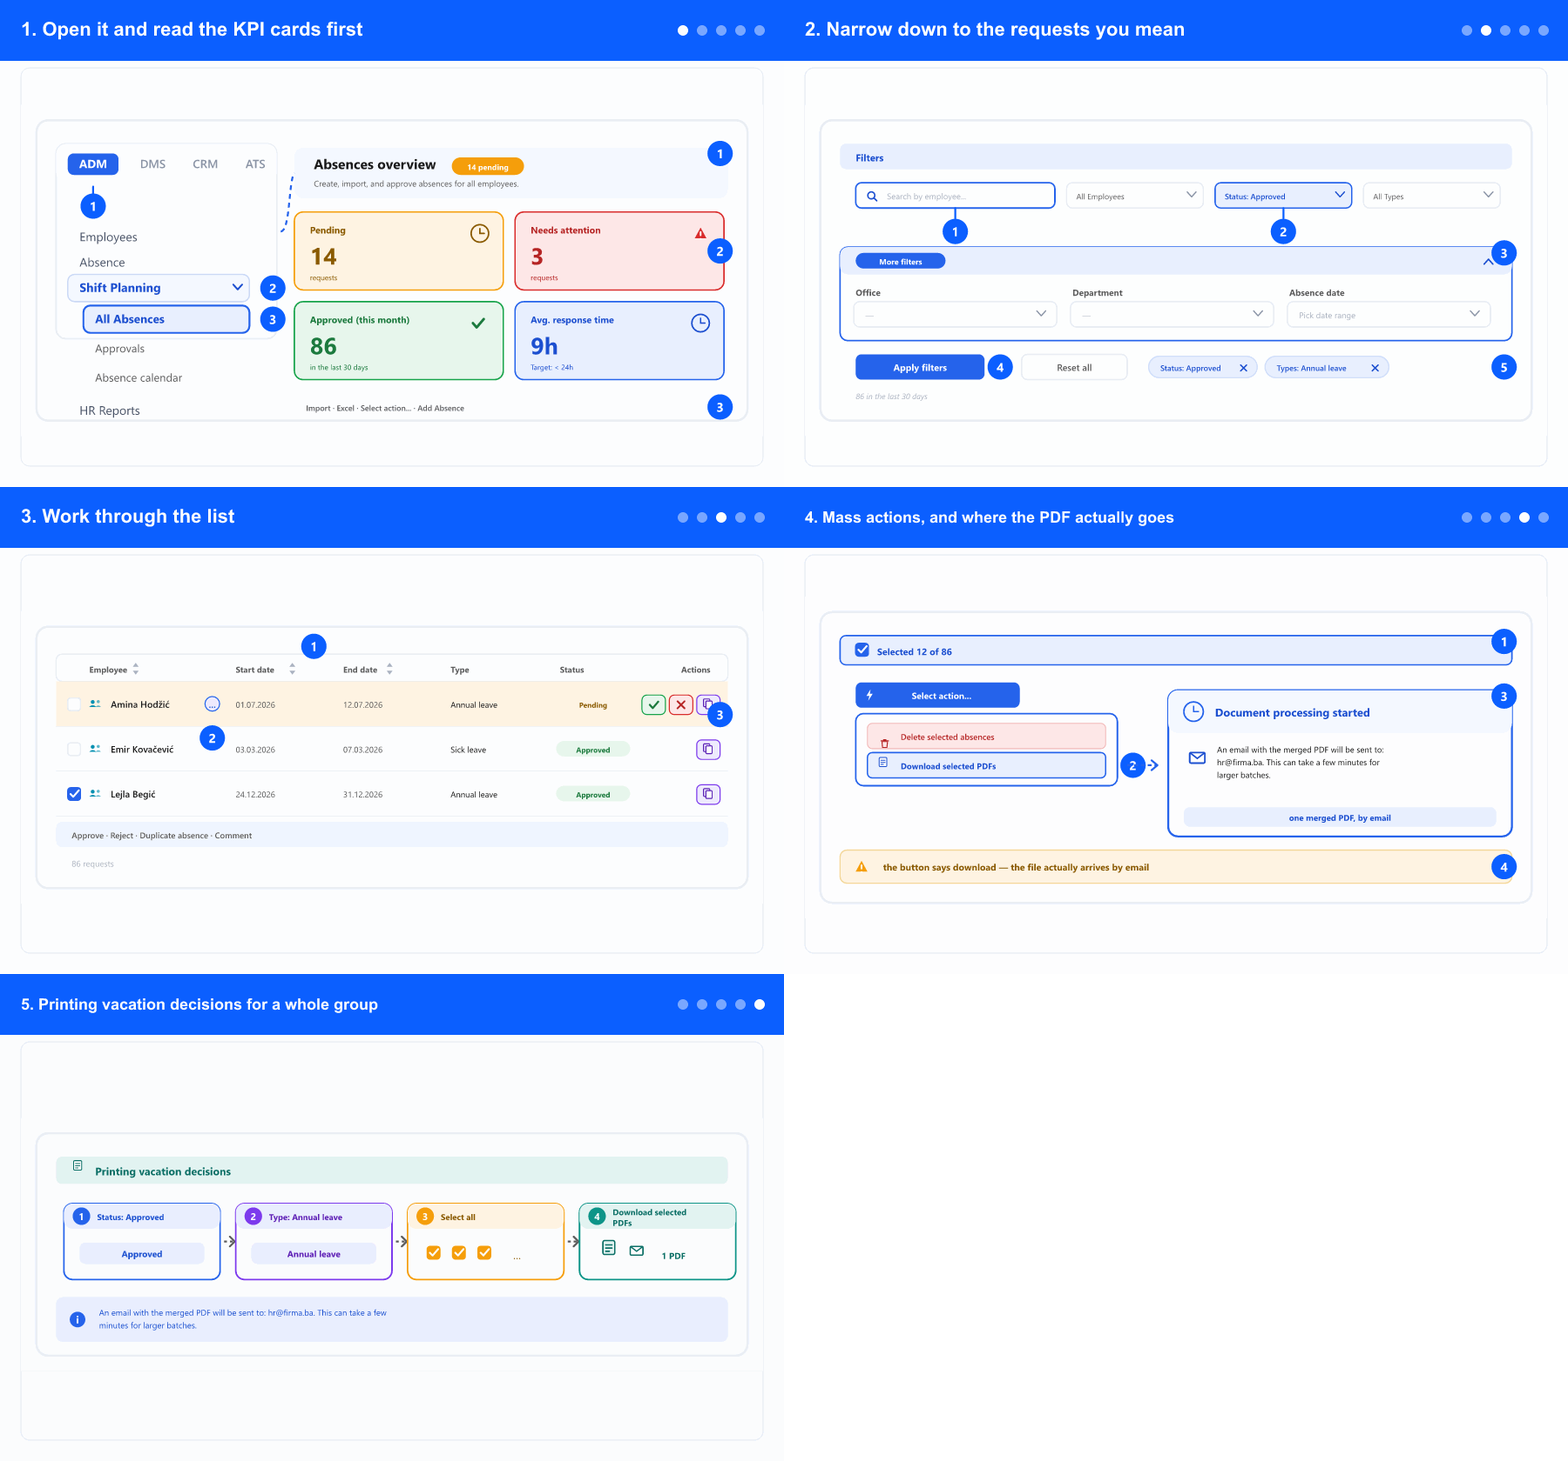
- In the left menu, open the ADM tab and select All Absences. The tabs (ADM / DMS / CRM / ATS) appear only when your company uses more than one module. If you don't see the item, your account has no access to this screen.
- The screen is titled Absences overview and the badge next to it counts requests still pending.
- Read the cards before the list. Pending is the queue; Needs attention is the subset that has waited too long or is about to start — that is where to begin.
- Approved (this month) and Rejected (this month) give the volume, and Avg. response time shows how fast decisions are being made against the < 24h target.
- The header also holds Import, Excel, the mass-action menu, and Add Absence for entering an absence on someone's behalf.
2. Narrow down to the requests you mean
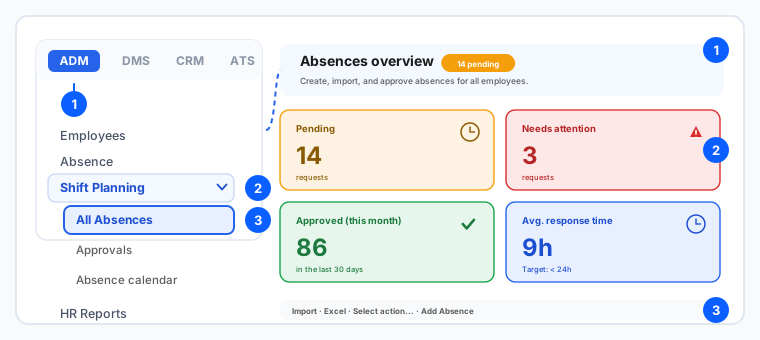
- Search by employee name, then narrow with All Employees, Status and All Types.
- More filters adds Office, Department and an Absence date range — use the range to answer questions like "who is off in August".
- Press Apply filters. Filters do not take effect as you pick them, which is deliberate — you set several and apply once.
- The chips under the filter bar show exactly what is active; remove one with its ✕, or use Reset all to start over. If the list looks emptier than expected, read the chips first.
- Filtering matters more here than on most screens: it is what defines the group for the mass actions in step 4.
3. Work through the list
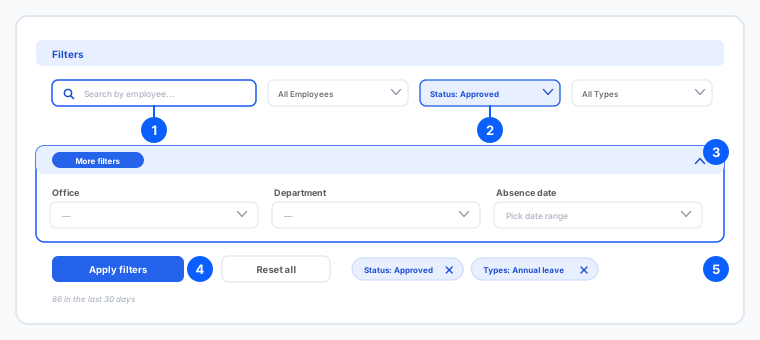
- Each row shows the Employee, the Start and End date, the Type, the Status and the days or hours it costs.
- Where the requester left a comment, an icon appears next to the name — open it before deciding, since it usually contains the cover arrangement.
- Approve and Reject act on that row directly. They appear only while the request is still pending.
- Duplicate absence pre-fills a new request from an existing one — useful for a recurring pattern. It creates a new record and does not copy attachments.
- Sort by employee or by date to group what you are reviewing; the row count under the list tells you how many requests match.
4. Mass actions, and where the PDF actually goes
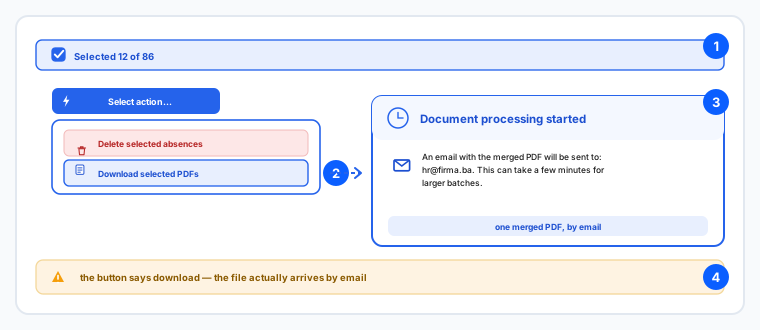
- Tick the rows you want. A bar above the list shows how many are selected out of how many match the filters.
- Open Select action…. There are two actions: Delete selected absences and Download selected PDFs.
- Choose Download selected PDFs and a message appears — Document processing started.
- Read that message. Despite the wording on the menu item, nothing downloads in the browser: an email with one merged PDF is sent to you, and for a large batch it can take a few minutes.
- So do not sit waiting for a file dialog, and do not click the action again — check your inbox instead. Repeating it just generates another email.
- The merged PDF contains one document per selected request, which is exactly what you want when printing a stack of decisions.
5. Printing vacation decisions for a whole group
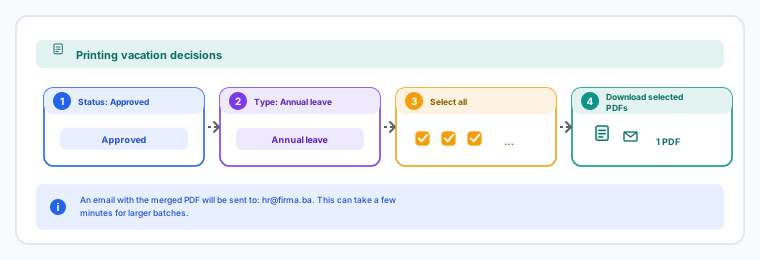
- This is the job most people come to this screen for. Set Status to Approved — an unapproved request has no decision to print.
- Set the type to Annual leave so sick leave and other types stay out of the batch.
- Add an Absence date range if you are printing for one period, and press Apply filters.
- Select all the filtered rows, then Select action… → Download selected PDFs.
- The merged PDF arrives by email. Print it once and you have every decision for the group, in one pass, instead of opening requests one at a time.
- Check the count before you send: the selection is what goes into the PDF, so a stray tick means a stray document in the middle of the stack.
Which actions you see depends on your permissions — without the delete permission that mass action is not offered. Whether a decision document can be produced at all depends on the absence type having a document template.
Related: Approve absences & submit requests for others · Create or edit an absence request · An employee's vacation balance and absence history · Company absence settings · Document templates and contract types.