Request time off for yourself from My Absences: choose the absence type and dates (or part of a day in hours), see who needs to approve it and how many days you have left, attach any documents, and submit. You can also edit or cancel a request that hasn't been locked yet. This page uses English labels from the product where available.
The whole flow at a glance (loops). Each step below explains one part.
1. Find My Absences in the menu
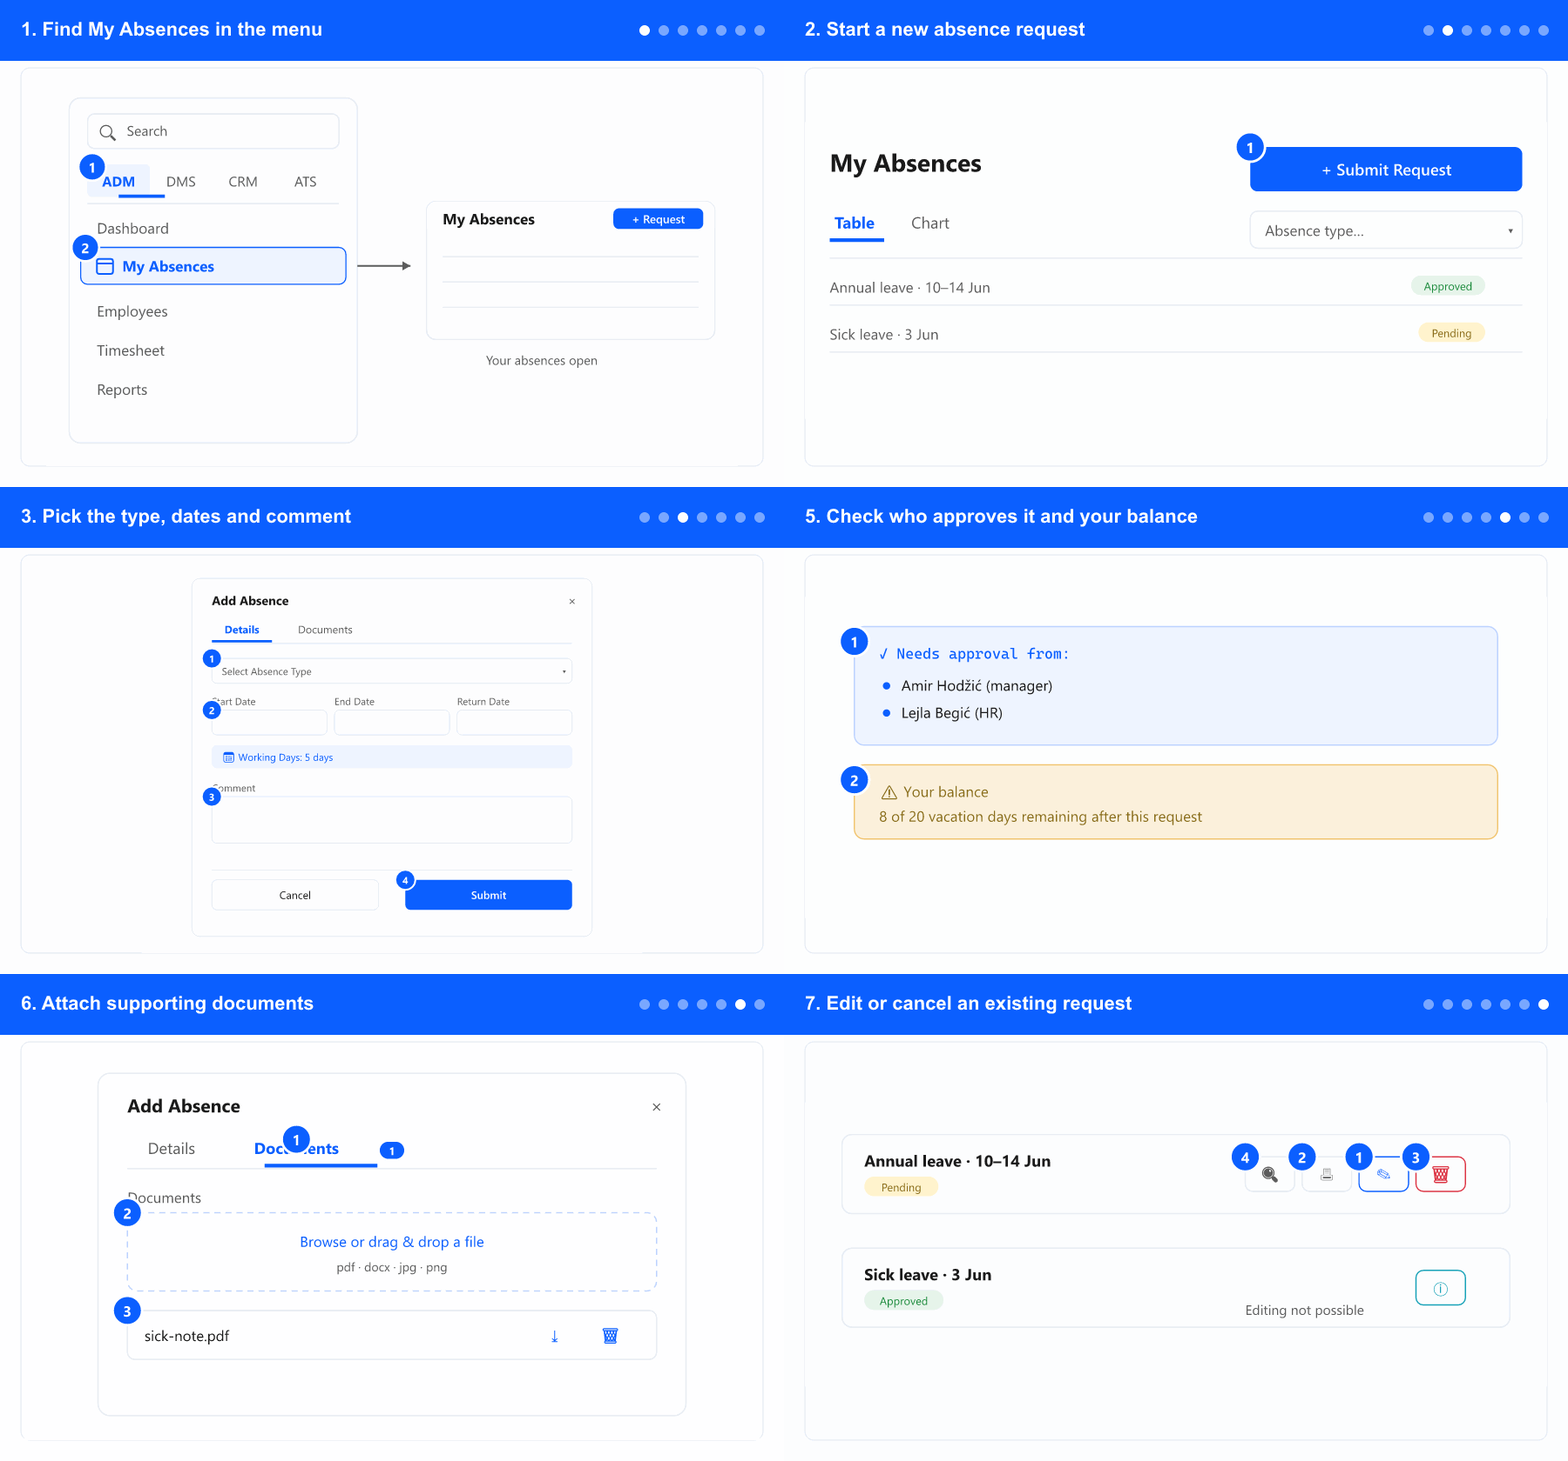
① Open the ADM tab · ② select My Absences.
In the left menu, open the ADM tab. The tabs (ADM / DMS / CRM / ATS) only appear when your company uses more than one module — otherwise the menu items are shown directly, so skip to the next step.
Select My Absences. Your absence page opens.
Don't see My Absences? Ask a company administrator — access depends on your company setup and permissions.
2. Start a new absence request
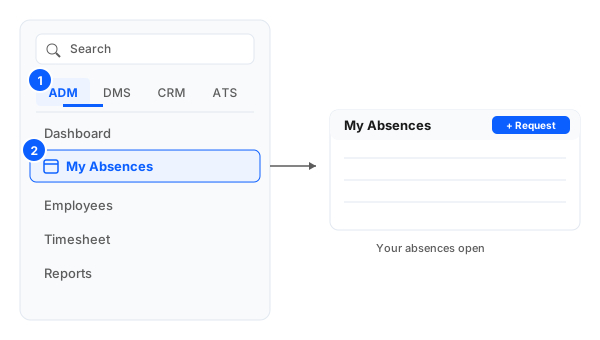
① The Submit Request button on the My Absences page.
Click Submit Request. The absence dialog opens on the Details tab.
The list below shows your existing absences (switch between Table and Chart, and filter by absence type if needed).
3. Pick the type, dates and comment
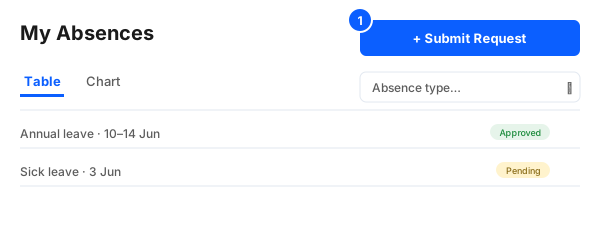
① Absence type · ② start, end and return dates · ③ comment · ④ Submit.
Open Select Absence Type and choose the type of leave.
Set the Start Date, End Date and Return Date. The dialog shows the number of working days the system calculates automatically from the dates you enter.
Add a Comment if you want to explain the request.
Click Submit to send the request. (Past dates may be blocked depending on your company's settings.)
4. Request part of a day (in hours)
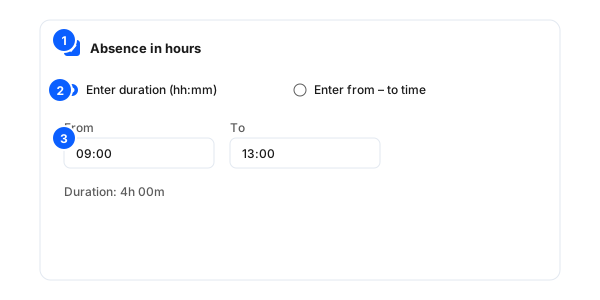
① Turn on Absence in hours · ② choose duration or from–to · ③ set the time.
If you see the Absence in hours option, tick it to request part of a day (this is available only when your company allows it).
Choose Enter duration (hh:mm) to type a length, or Enter from – to time to set a From and To time. The dialog shows the resulting Duration.
5. Check who approves it and your balance
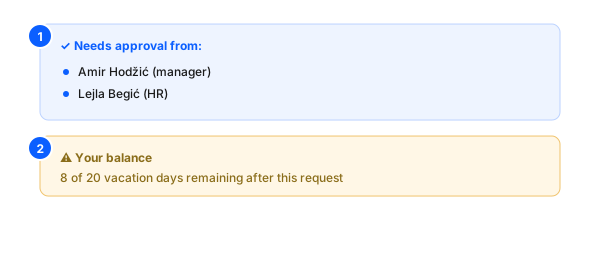
① Who needs to approve the request · ② how many days you have left.
Read the approval banner: it lists who needs to approve your request (one approver, the first of several, or everyone), or says no approval is required. If no approver is set up, a warning tells you who to contact.
Check the balance banner for how many days remain after this request. If it would exceed your allowance, you'll see a warning or error.
6. Attach supporting documents
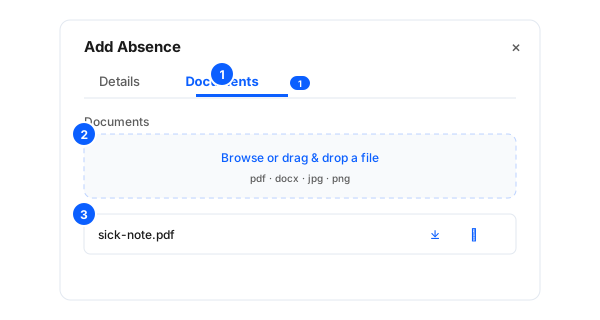
① Open the Documents tab · ② upload a file · ③ the attached file appears in the list.
Switch to the Documents tab (the badge shows how many files are attached).
Browse for or drag in a file (pdf, docx, jpg, png and similar).
Each uploaded file appears in the list, where you can open, download or remove it. Then submit from the Details tab.
7. Edit or cancel an existing request
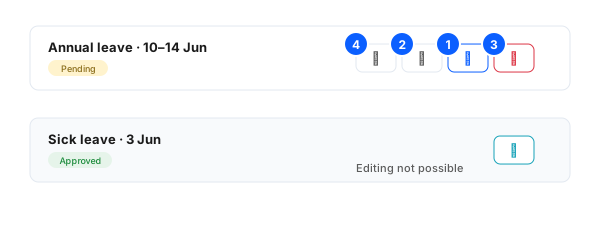
① Edit · ② print · ③ cancel · ④ comments — and the “editing not possible” state when locked.
On a request's row, click the pencil to edit it — the same dialog reopens as Edit absence.
Use the other row actions to print the request, cancel it (trash), or open its comments.
If a request is already approved or locked, editing is not available — an info icon shows Editing not possible; click it to learn why.