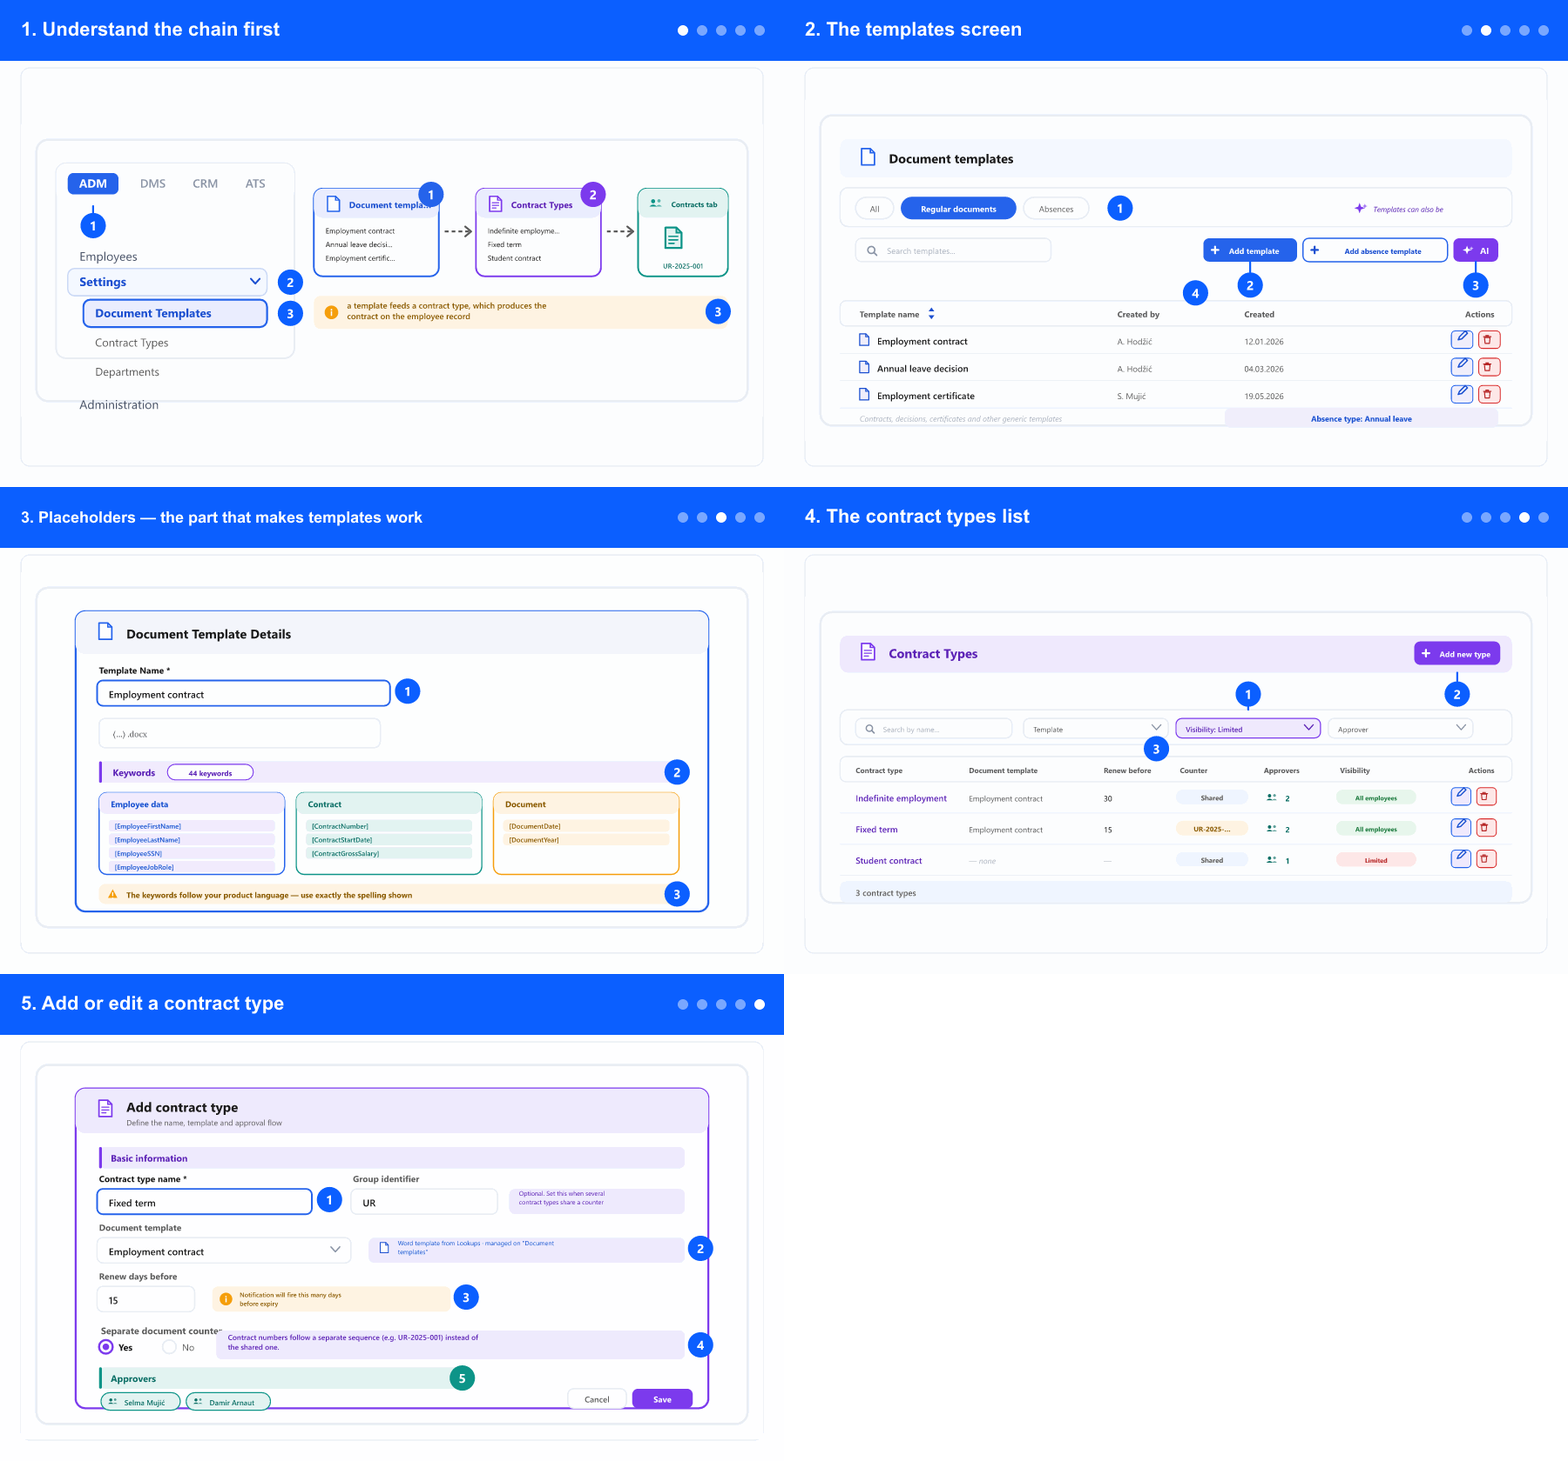
1. Understand the chain first
- In the left menu, open the ADM tab and expand Settings. The tabs (ADM / DMS / CRM / ATS) appear only when your company uses more than one module.
- A document template is the Word document with placeholders — the wording of your contract, decision or certificate.
- A contract type points at one template and adds the rules around it: how the document is numbered, how many days before expiry to warn, and who approves.
- Only then can someone add a contract on an employee's Contracts tab and get a finished, numbered document.
- Work in that order. Creating a contract type before its template means going back to fill in the template afterwards.
2. The templates screen
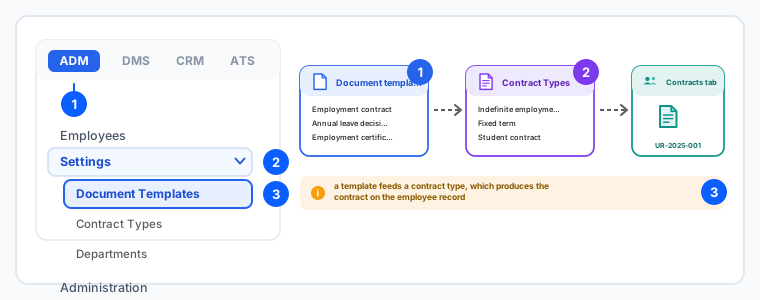
- Open Document Templates. There are two kinds, and the segment bar switches between them: Regular documents (contracts, decisions, certificates) and Absences. All shows both.
- Absence templates carry an extra Absence type column — each one is tied to the absence it prints, which is how the right decision comes out for a vacation versus sick leave.
- Use Add template for a regular document and Add absence template for an absence one. Picking the wrong button puts the template in the wrong list.
- The AI button drafts a template for you instead of starting from a blank document — useful when you have the wording in your head but not in a file. Review what it produces before using it.
- Search by name and sort the list by name; each row shows who created the template and when.
3. Placeholders — the part that makes templates work
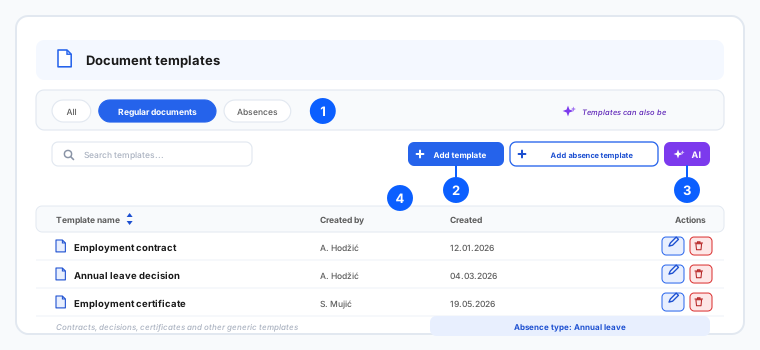
- Give the template a name people will recognise in a dropdown, then either upload a Word document or write the text in the editor.
- Wherever the document should show real data, type a keyword in square brackets. When the document is generated, each keyword is replaced with that employee's value.
- The window lists 44 keywords, grouped so you can find them: Employee data (name, ID number, job role, address, working hours…), Contract (number, start and end date, gross and net salary, also spelled out in words) and Document (date, month, year).
- The keywords follow your product language. In English they read
[EmployeeFirstName]; in Bosnian the same keyword is[ImeZaposlenog]. Copy the spelling from the list in front of you rather than from an older document. - A misspelled keyword is not reported as an error — it simply stays in the finished document as literal text. If you see square brackets in a generated contract, that is the cause.
- Test a new template by generating one document for a real employee before you use it for everyone.
4. The contract types list
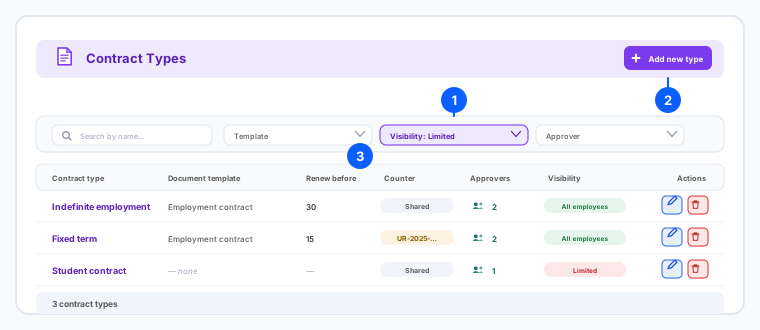
- Open Contract Types. Each row summarises the type: its Document template, Renew before days, its Counter, how many Approvers it has and its Visibility.
- A type showing — none under Document template cannot produce a document — that is the first thing to fix.
- Filter by Template to see which types use a template you are about to change, by Visibility (All employees or Limited), or by Approver.
- The Template filter is the safe way to check impact before editing or deleting a template — you see every contract type that depends on it.
5. Add or edit a contract type
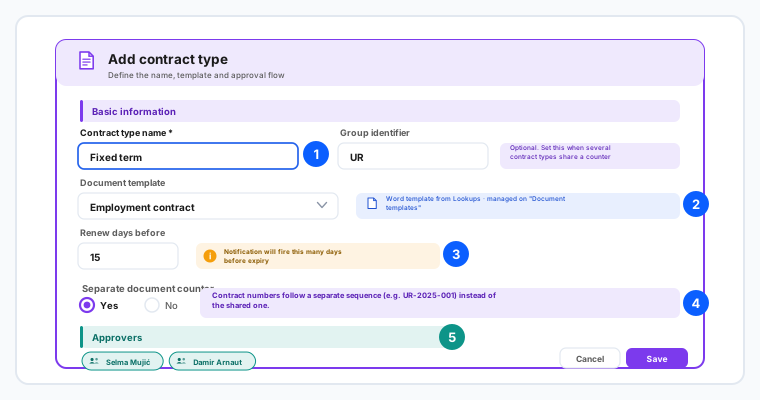
- Click Add new type and enter the Contract type name — the only required field. It is what people pick when adding a contract, so name it the way your company refers to it.
- Pick the Document template. The hint next to it points back to the templates screen if the one you need does not exist yet.
- Set Renew days before. A notification fires that many days before a contract of this type expires — this is what stops fixed-term contracts from lapsing unnoticed. Choose a number that leaves time to actually prepare the renewal.
- Decide the numbering with Separate document counter. No uses the company's shared contract counter — all contracts share one running number. Yes gives this type its own sequence, for example UR-2025-001.
- Use Group identifier when several contract types should share one sequence — set the same identifier on each. Leave it empty otherwise.
- Decide the numbering before the first contract is issued. Changing it later leaves a gap or a repeat in a numbering series that people rely on.
- Add the Approvers for this type. A warning appears next to an approver whose account is no longer in a state that lets them approve — worth checking when approvals seem stuck.
- Set the visibility — all employees, or a limited group — and click Save.
Templates and contract types are company-wide registries, so a change affects every contract issued from then on. Documents already generated keep the wording and number they were created with.
Related: Employee contract linked documents (annexes) · Fill in and change an employee's basic data · Set up departments and offices.