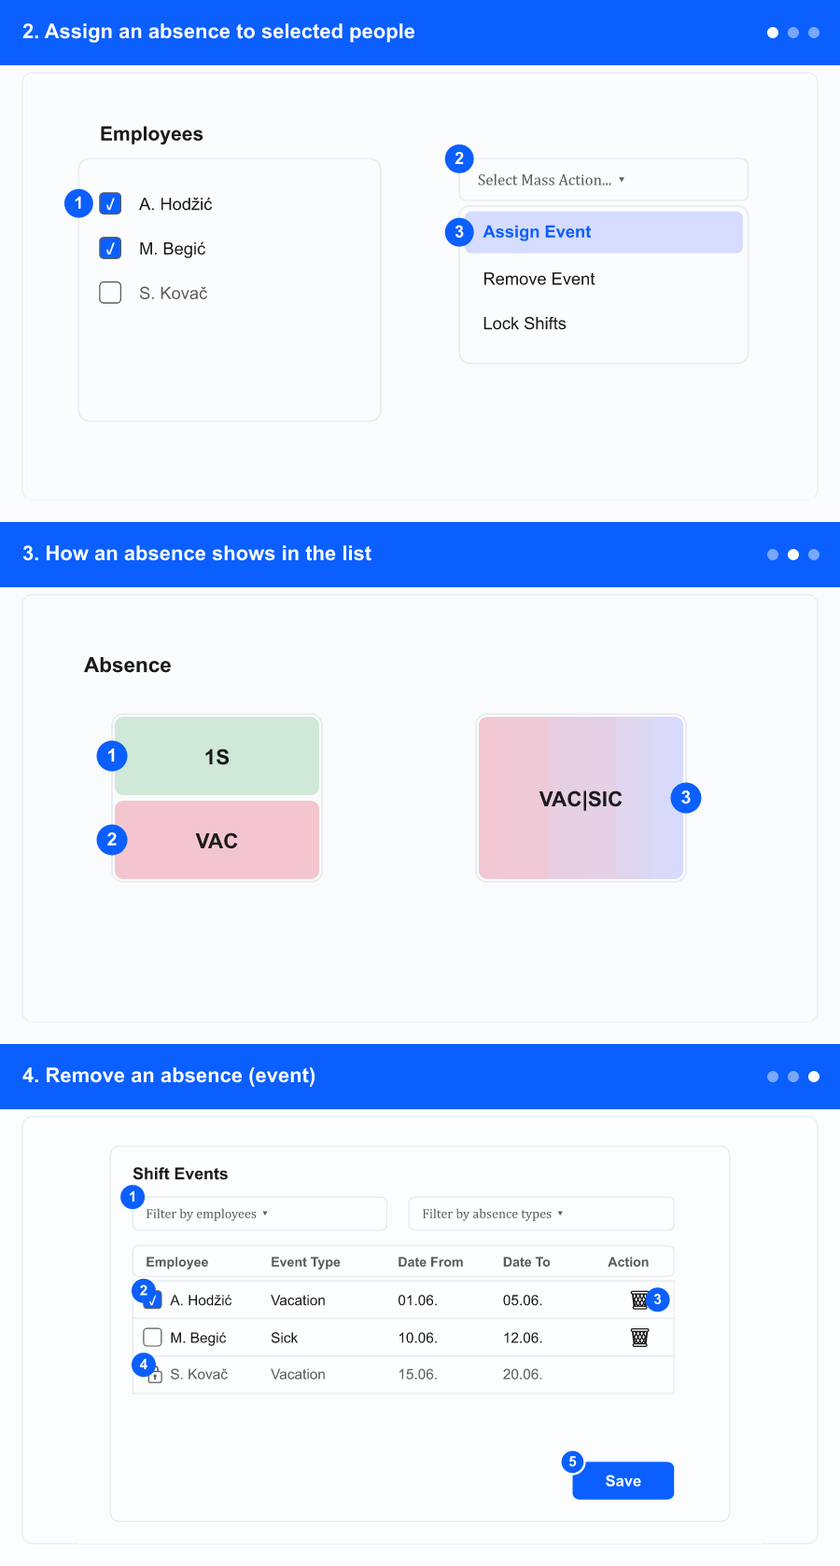
On the shift plan an absence is shown as an event. This guide covers assigning an absence to people from the plan, reading how it appears in the list, and removing absences again. For opening the screen, views and filters, see the Shift planning overview.
The whole flow at a glance (loops). Each step below explains one part.
1. Open Shift Planning and load the month
In the left menu, open the ADM tab (if shown), then the Shift Planning group, and select Shift Planning.
Choose the month and Search so the people you need are in the list.
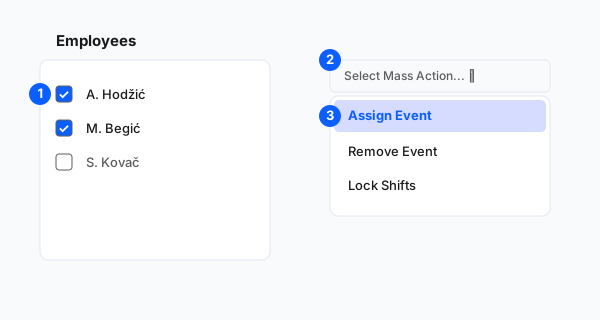
2. Assign an absence to selected people
① tick employees · ② open Select Mass Action · ③ choose Assign Event.
Tick the employees who need the absence in the left column.
Open Select Mass Action and choose Assign Event.
The standard absence form opens for the selected people, set to the loaded year and month. Fill the type, dates and comment there — see Create or edit an absence for the form fields.
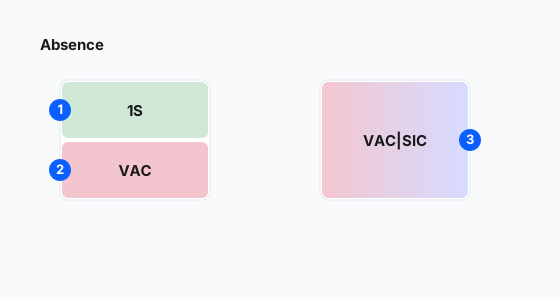
3. How an absence shows in the list
① shift on top · ② absence band below (colour + short code) · ③ two absences on one day blend into a gradient.
In each day cell the lower band is the absence: it uses the absence type's colour and a short (3-letter) code.
When a day has more than one absence, the band blends their colours; hover to read the full type name.
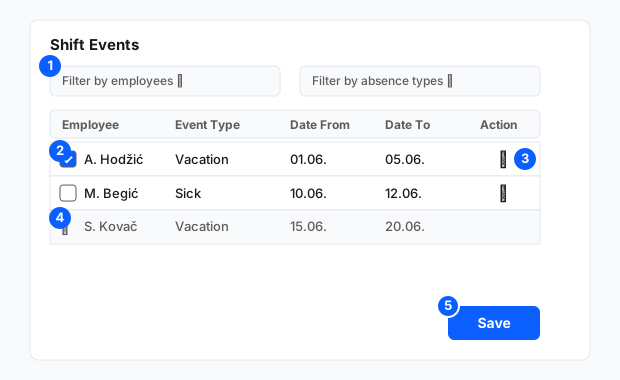
4. Remove an absence (event)
① filters · ② row checkbox · ③ delete a row · ④ a locked row (padlock) · ⑤ Save.
Open Select Mass Action → Remove Event. The Shift Events dialog lists the absences.
Narrow the list with Filter by employees and Filter by absence types. Columns are Employee, Event Type, Date From and Date To.
Tick rows (or use select-all) to remove several at once, or use the row trash to delete a single one.
Rows blocked by a shift-plan lock show a padlock instead of a checkbox and can't be removed; a banner explains why.
Click Save to apply. Empty states tell you when there are no events or no rows for the chosen filters.