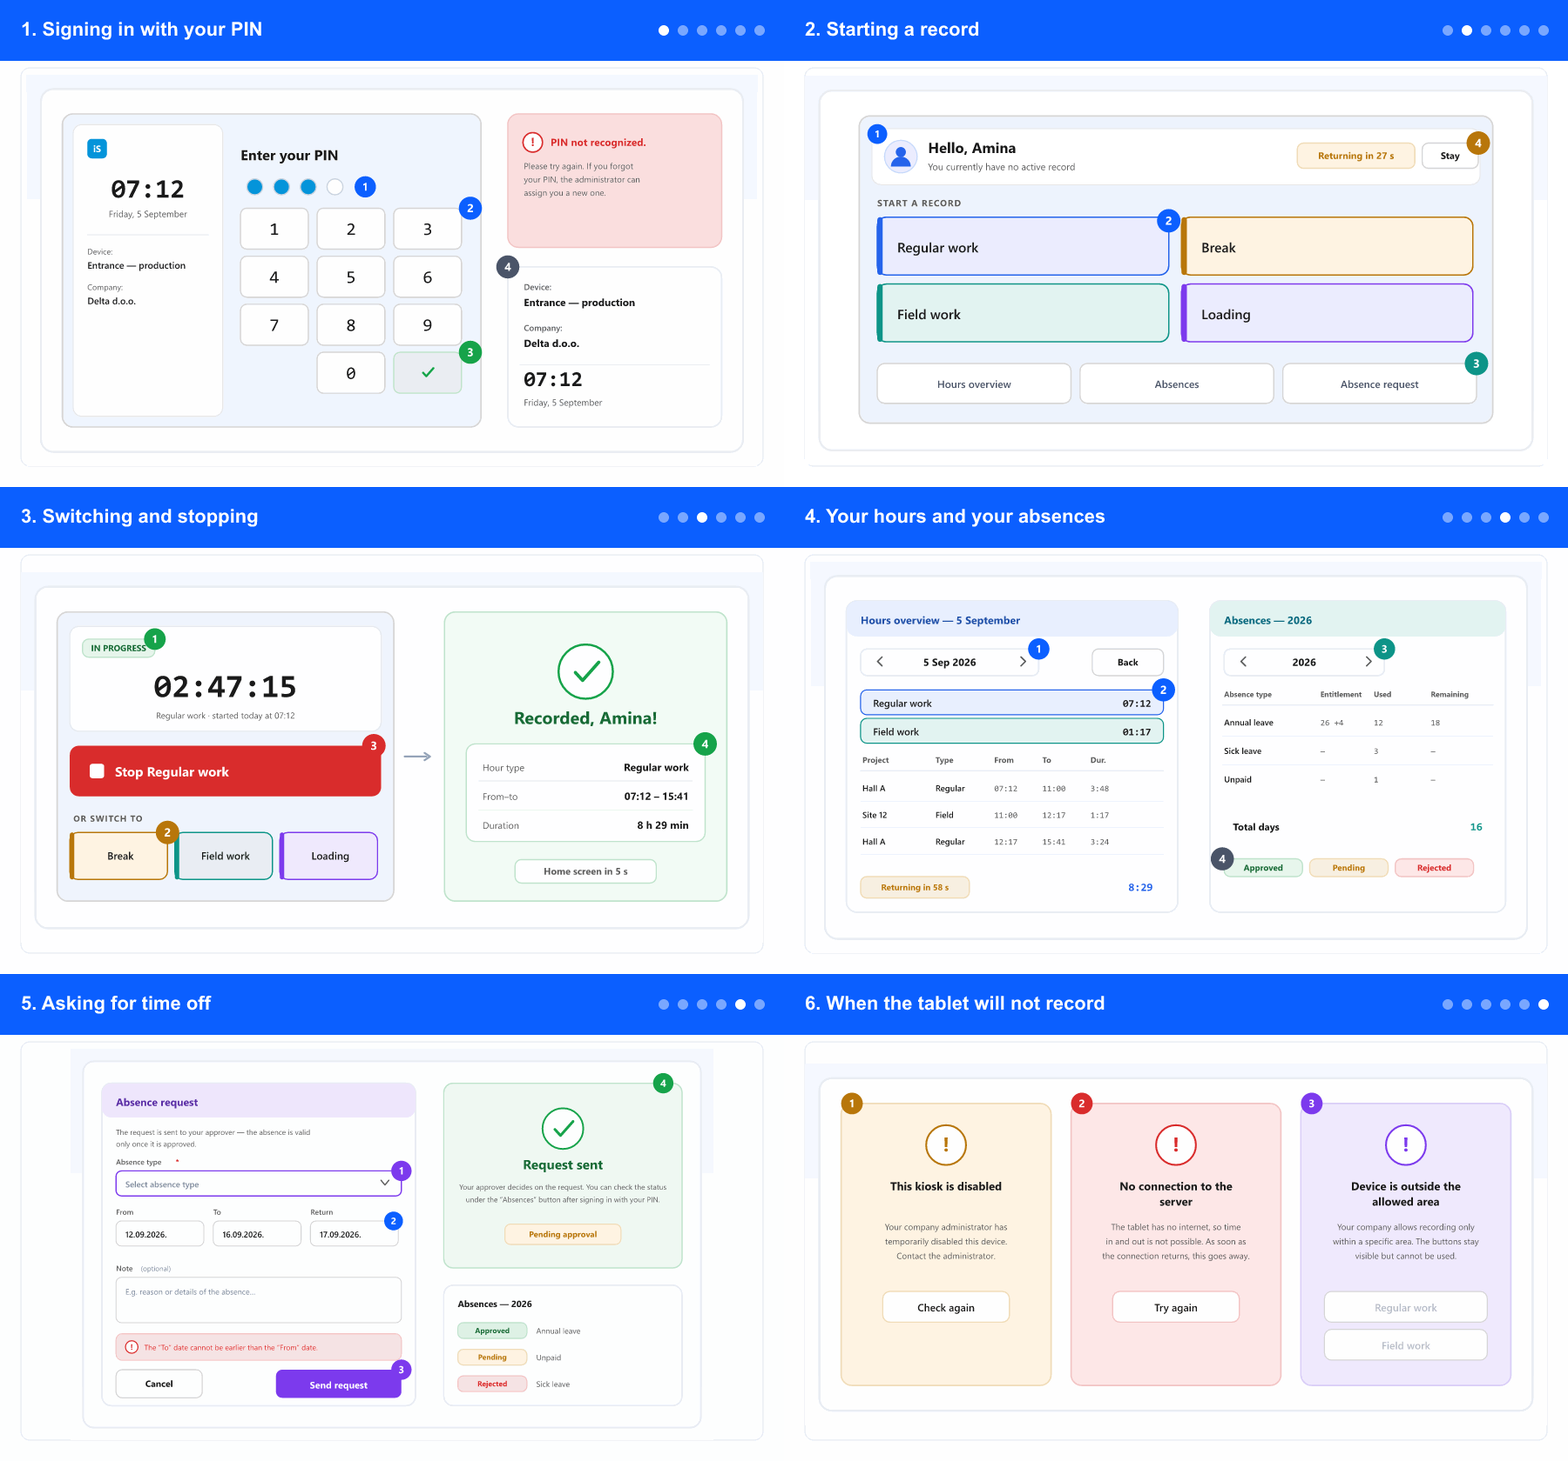
1. Signing in with your PIN
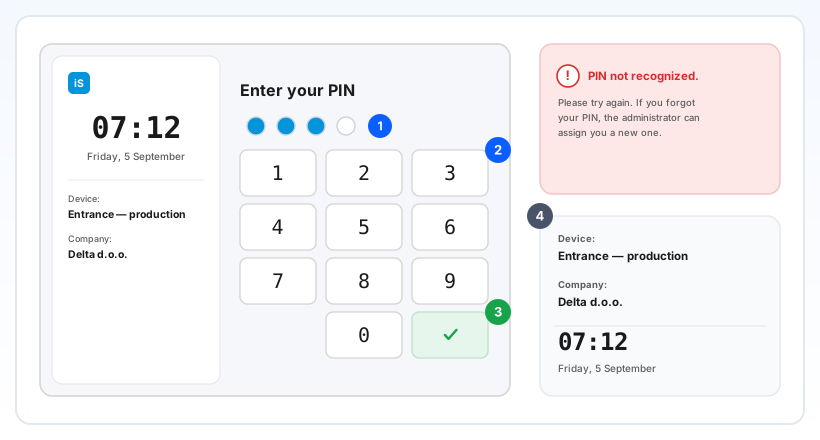
- The tablet waits on Enter your PIN. Type your code on the keypad; a dot fills for each digit, so you can see how many you have entered.
- The green tick becomes available from the fourth digit. Tap it to sign in.
- Mistyped? Tap the back key to delete the last digit — there is no need to wait or start over.
- Check the left-hand column before you record anything: the device name and the company say which terminal you are standing at, and the clock is the time that will be recorded.
- PIN not recognized means the code is wrong or was never issued to you. Try once more, then ask your administrator for a new PIN — nobody on the tablet can look it up for you.
- After several wrong attempts in a row the tablet asks you to wait a minute. Nothing is broken; try again shortly.
- Your PIN is yours. Somebody else typing it records hours in your name.
2. Starting a record
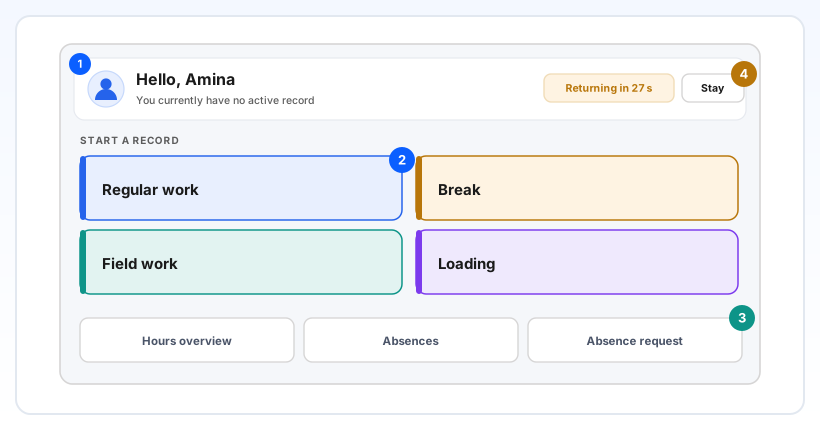
- After the PIN the screen greets you by name and, if nothing is running, says You currently have no active record.
- Under START A RECORD tap the tile for what you are starting — regular work, a break, field work, or whatever your company uses. The colours are the ones your company set.
- One tap is all it takes. A short confirmation appears and the screen returns to the PIN pad on its own, so the next person can step up.
- The Returning in … counter in the corner shows when the screen will clear. Tap Stay if you need more time — the counter starts again.
- A tile shown as unavailable cannot be started right now. That is a company setting, not a fault on the tablet.
- The three buttons at the bottom — Hours overview, Absences, Absence request — appear only if your company switched them on for this tablet, and only while no record is running.
3. Switching and stopping
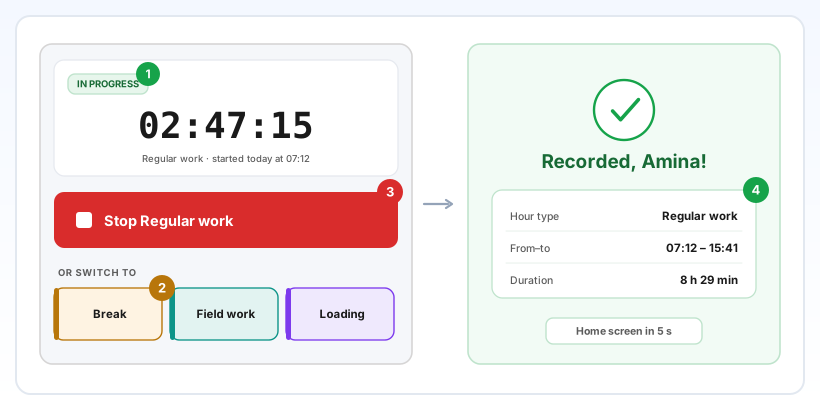
- Type your PIN again at any point. If a record is running you see IN PROGRESS, the hour type, the time it started and a timer counting up.
- To change activity, tap a tile under OR SWITCH TO. You do not stop first: the current record closes and the new one starts at the same moment, with no gap in between.
- The type that is running is not offered in that row — you cannot switch to what you are already doing.
- To finish, tap the red Stop … button. It is the largest button on the screen on purpose.
- The confirmation names what was recorded: the hour type, from–to and the duration. Read it before you walk away; that is your receipt.
- The screen goes back to the PIN pad after a few seconds by itself. There is no sign-out to press.
- Forgot to stop at the end of a shift? Tell your supervisor. Your administrator can close the record in the web application with the right end time.
4. Your hours and your absences
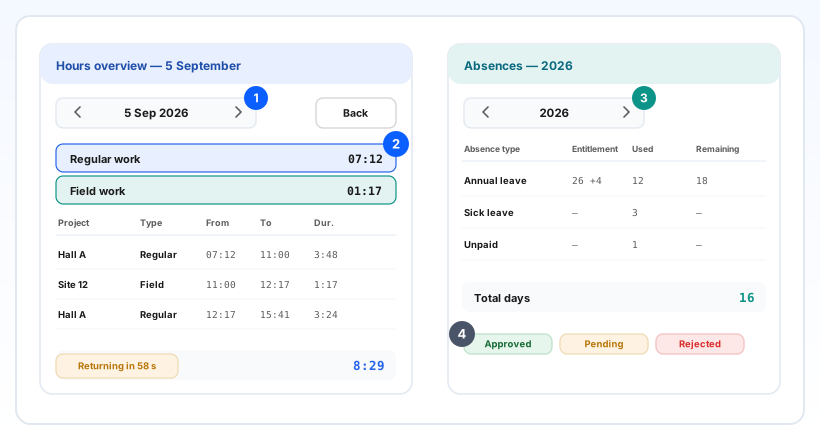
- Sign in with your PIN and tap Hours overview. The day's entries are listed with project, hour type, from, to and duration, plus a Total at the bottom.
- Move to another day with the arrows next to the date. No entries simply means nothing was recorded that day.
- Tap Absences for the year: your entitlement (including days carried over from last year), how much is used and how much remains, then each absence with its dates and status.
- Status chips read Approved, Pending, Cancelled or Rejected. Pending means your approver has not decided yet.
- Change the year with the arrows next to it, the same way as the day.
- These screens only show information — nothing you tap here changes your hours or your leave.
- A counter in the corner returns the tablet to the PIN pad after about a minute of no touching, so your data is not left on screen for the next person. Any tap starts the minute again.
- Back returns you to the buttons immediately.
5. Asking for time off
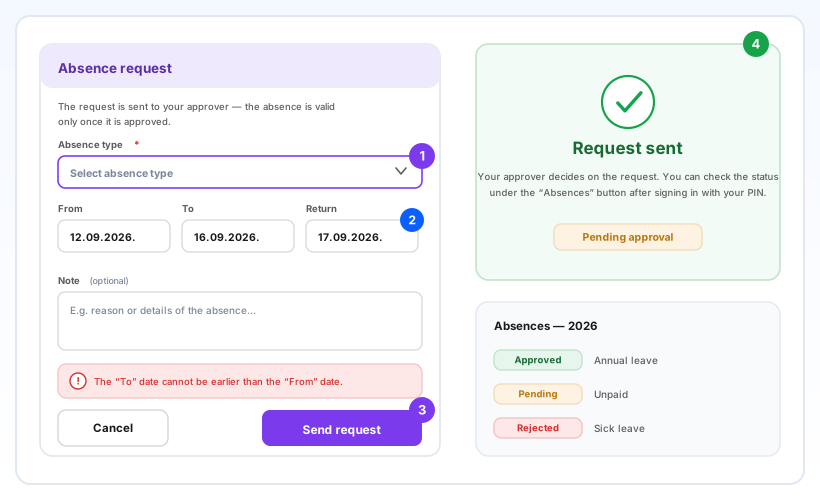
- Sign in with your PIN and tap Absence request. The first line says it plainly: the request goes to your approver and the absence counts only once it is approved.
- Pick the Absence type — the list is the one your company uses. It is required, and the field is marked.
- Set From and To, then Return — the first day you are back at work.
- Dates have to make sense: To cannot be before From, and Return cannot be before To. The form says so instead of sending something wrong.
- Add a Note if there is anything your approver should know. It is optional.
- Tap Send request. Request sent confirms it, and the request is now Pending approval.
- Check the outcome later under the Absences button — after your PIN, the request appears there with its status.
- Nothing can be edited or withdrawn from the tablet. If you sent the wrong dates, tell your approver or your administrator.
6. When the tablet will not record
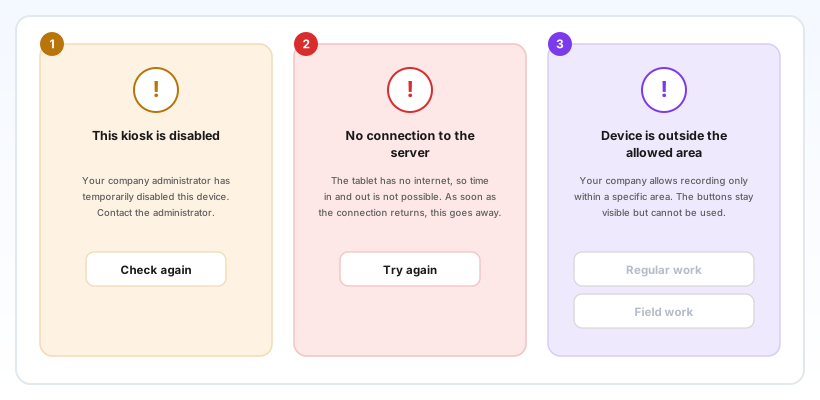
- This kiosk is disabled means your administrator switched this terminal off. Recording here is not possible — tell your administrator, and use the mobile app instead if you have it.
- No connection to the server means the tablet has no internet. Nothing can be recorded while it shows, and the screen clears itself as soon as the connection returns. Try again checks straight away.
- Device is outside the allowed area appears when your company only allows recording inside a certain area and the tablet reports a position outside it. The buttons stay visible but greyed out — no hour type has disappeared.
- Location is not available means the tablet cannot read its position at all — usually location is switched off. That is for your administrator to fix on the device.
- In every one of these cases, note the time and tell your supervisor, so your hours can be entered in the web application instead.
- Do not keep retyping your PIN. None of these messages is about your code.
What you see depends on how your company set up this particular tablet: the photo after the PIN, the three buttons at the bottom, and whether a location is required. Another tablet in the same company can show more or less. Hours recorded here go into the ordinary timesheet, so your supervisor sees them exactly as if they had been entered in the web application. Your kiosk PIN is separate from your web and mobile password — changing one does not change the other.
Related: Setting up the tablet kiosk (administrator) · Clocking in at a kiosk and the kiosk dashboard · The mobile kiosk: clocking in from a phone