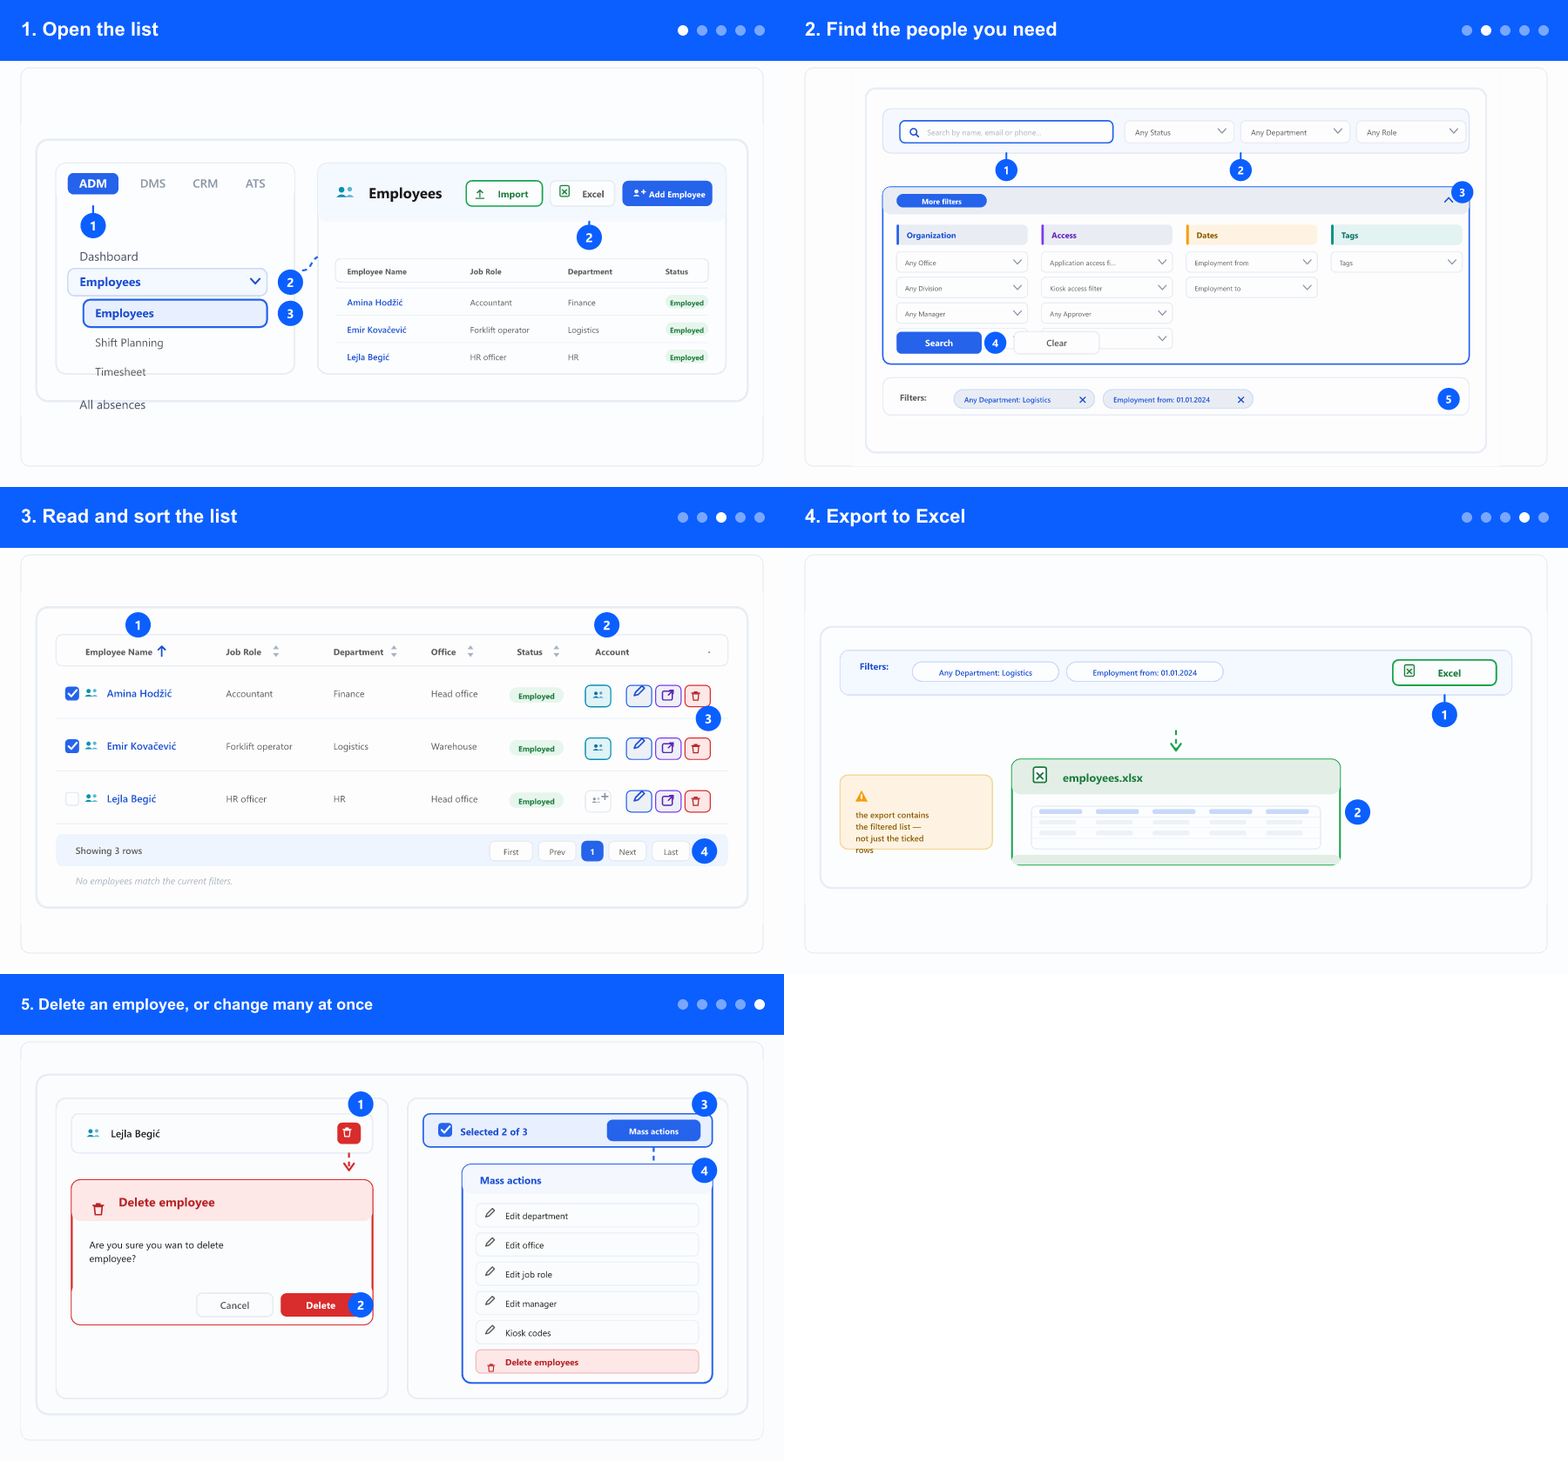
1. Open the list
- In the left menu, open the ADM tab. The tabs (ADM / DMS / CRM / ATS) appear only when your company uses more than one module — otherwise the items are visible right away.
- Select Employees. The list opens showing your company's people.
- Along the top right are the actions that work on the whole list: Import and Add Employee (both only if you may add people) and Excel.
- Click any name to open that person's record.
2. Find the people you need
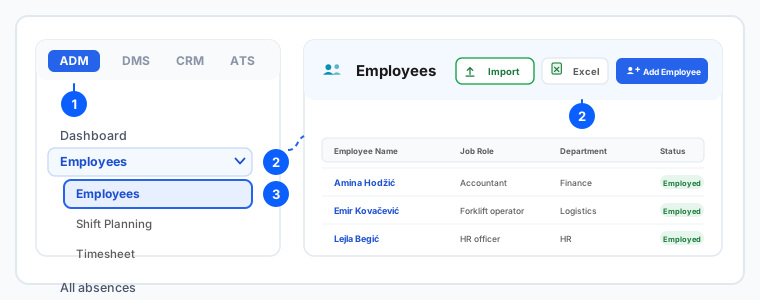
- The search box on the left matches name, email or phone number — one box, so you do not have to know which of the three you are typing.
- Next to it are three quick filters you need most often: Any Status, Any Department and Any Role.
- Click More filters for everything else, grouped in four sections: Organization (office, division, manager, team), Access (application access, kiosk access, approvers, viewers), Dates (employment from / to) and Tags.
- Press Search to apply. Changing a filter alone does not reload the list — Search does.
- The chips under Filters show exactly what is applied. Remove one with its ✕, or use Clear to start over — useful when the list looks emptier than it should.
- If nothing matches, the list says so instead of just going blank: “No employees match the current filters.”
3. Read and sort the list
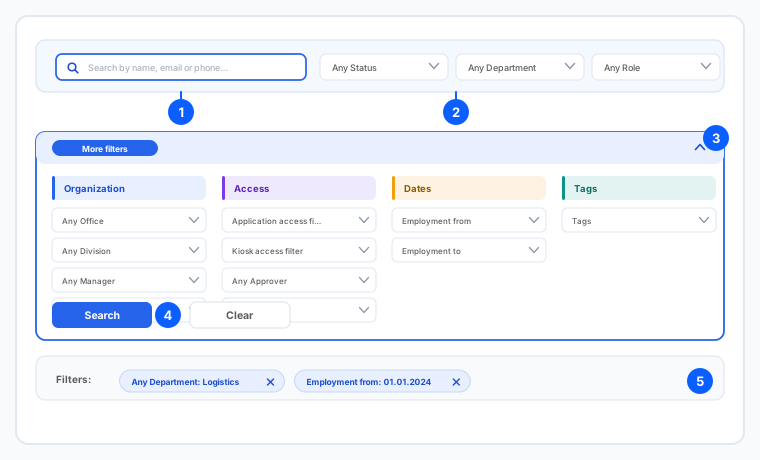
- The columns are Employee Name, Job Role, Email, Team, Phone, Department, Office, Status and Created.
- Click a column header to sort by it; the arrow shows the direction. Click again to reverse.
- The account column tells you at a glance who can sign in. Where there is no account you get Add user profile; where there is one, Open user profile.
- The row actions are Edit, Edit in a new tab and Delete. Use the new-tab one when you are working through several people and want to keep the list where it is.
- Below the list, the row count tells you how many people match, and the pager moves between pages (first, previous, next, last).
4. Export to Excel
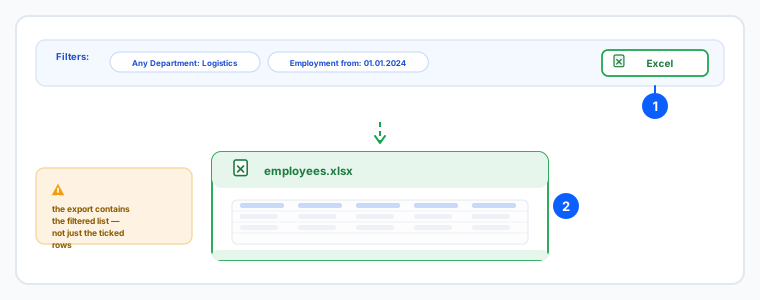
- Set the search and filters so the list on screen is what you want to send — the export mirrors it.
- Click Excel. The file downloads straight away; there is no column picker to go through.
- The export follows the filters, not the ticked rows. Ticking rows is for the mass actions in step 5 — it does not narrow the export. To export a subset, filter down to it first.
- Nothing is changed by exporting, so it is safe to try a filter, export, adjust and export again.
5. Delete an employee, or change many at once
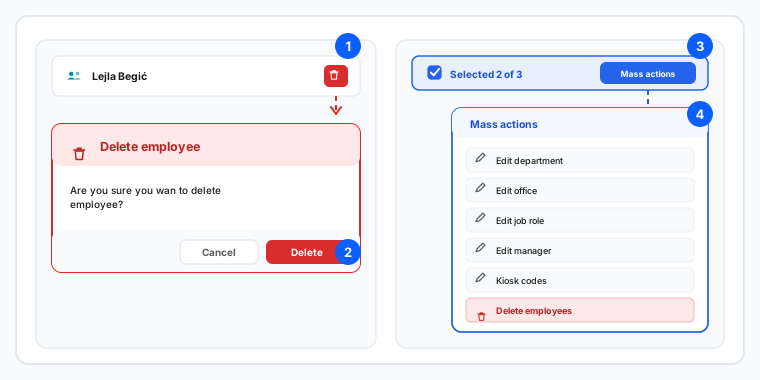
- To remove one person, click Delete on their row. A confirmation appears — Delete employee — and nothing happens until you confirm.
- Deleting removes the employee's data. Before you delete someone who has left, consider changing their status instead: that keeps the history for reports while taking them out of the active workforce.
- To change several people at once, tick their rows. A selection bar appears above the list showing how many are selected, with a Mass actions button.
- From there you can change department, office, job role, manager or viewers for everyone selected, generate kiosk codes, create login credentials for people without an e-mail (see Create login credentials for many employees at once), or delete them together.
- Mass actions are the reason to filter first: filter to exactly the group you mean, tick all, then apply one change instead of opening twenty records.
- Which actions you see depends on your permissions — without the delete permission the action is not offered at all.
Search and filters work together, and the Excel export always reflects them. Ticked rows drive the mass actions only. The link back to the classic view exists for the transition period and is not needed for normal work.
Related: Add a new employee · Fill in and change an employee's basic data · Create a user account (login) · Attach documents to an employee's record.