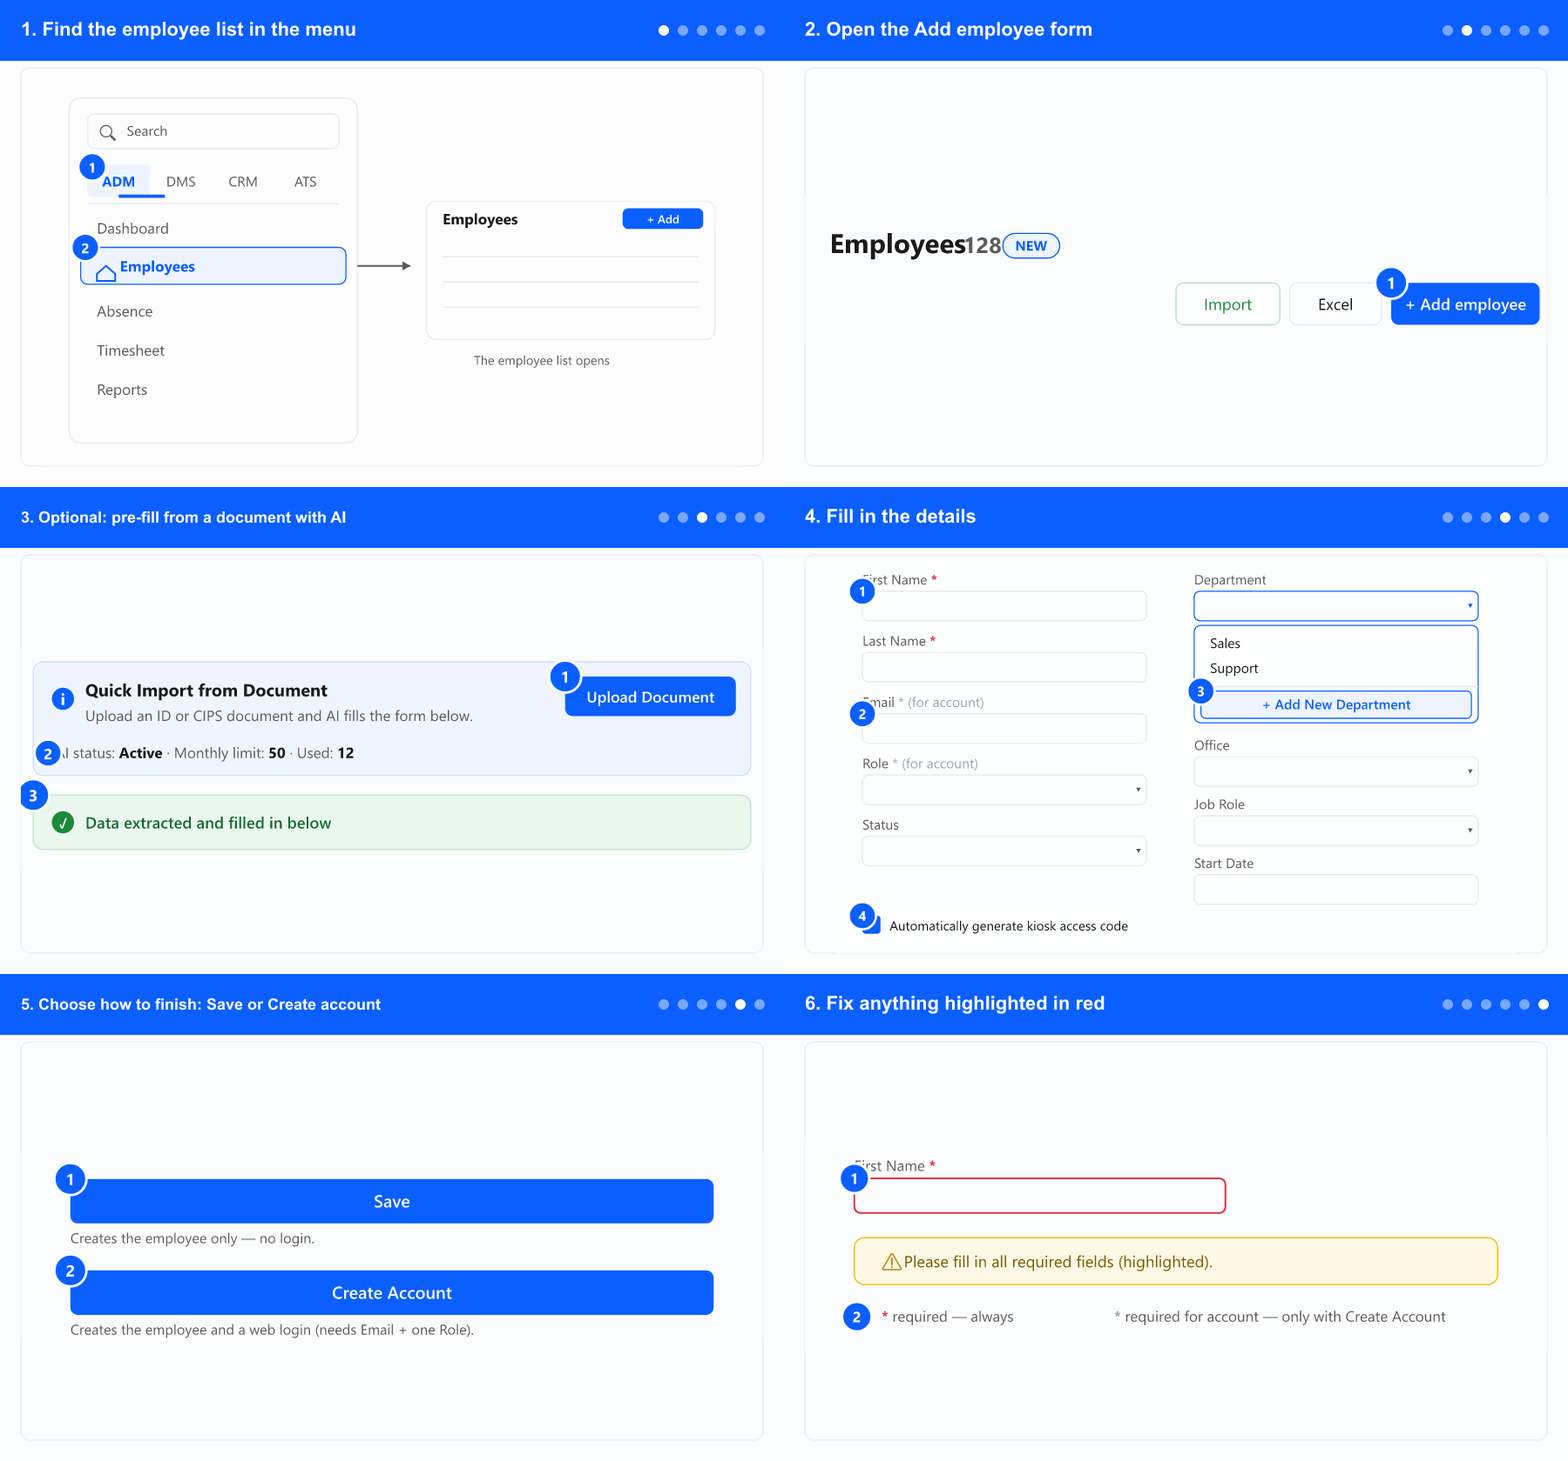
1. Find the employee list in the menu
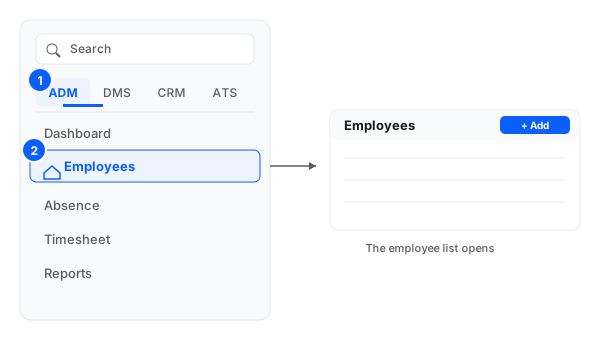
- In the left menu, open the ADM tab. The tabs (ADM / DMS / CRM / ATS) only appear when your company uses more than one module — if you have a single module, the menu items are shown directly, so skip to the next step.
- Select Employees. The employee list opens. Tip: you can also type Employees in the menu search box at the top to jump straight to it.
- Don't see Employees? It needs the HR module and the right permission — ask a company administrator.
2. Open the Add employee form
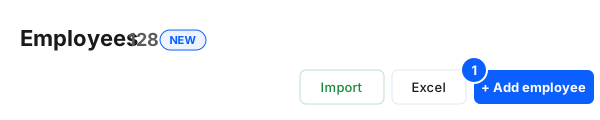
- In the employee list header, click Add employee.
- Don't see the button? Adding employees needs the right permission — ask a company administrator.
- If the list is empty, the same Add employee button also appears in the empty-state message.
3. Optional: pre-fill from a document with AI
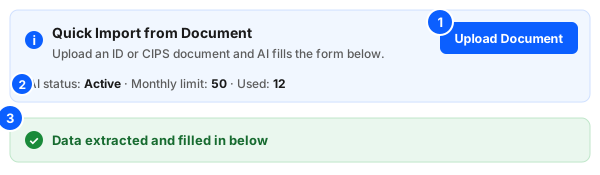
- Click Upload Document at the top of the dialog and choose a PDF, JPG, or PNG (for example an ID card or CIPS document).
- Check the AI status and monthly limit shown in the banner. When the monthly limit is reached, uploading is unavailable for the rest of the month.
- When parsing finishes you'll see Data extracted and filled in below and the form fields are filled in for you — review them before saving. If a duplicate national ID (JMB) is detected, a warning appears and you must resolve it before saving.
This step is optional — you can always type the details by hand. If you don't need it, skip straight to step 4.
4. Fill in the details
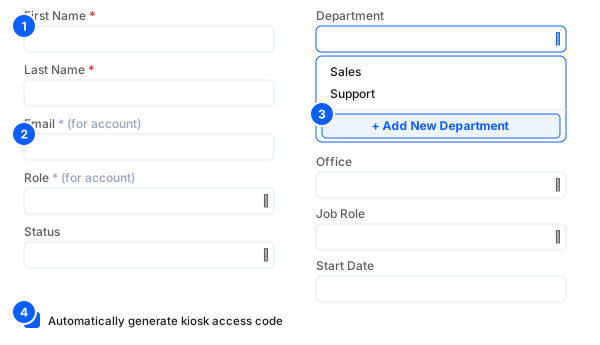
- Enter First Name and Last Name — these are always required (marked *).
- If you plan to open a user account, also fill Email and pick a Role — these are marked “required for account”. Other fields (Status, Department, Office, Job Role, Start Date) are optional here. You don't have to open the account now — it can be added later, after the employee is already in the system.
- If a Status, Department, Office, or Job Role you need isn't in the list, open that dropdown and choose Add New … to create it without leaving the form.
- If your company uses kiosk devices, leave Automatically generate kiosk access code ticked so the new employee gets a code.
5. Choose how to finish: Save or Create account

- Click Save to add the employee record only. They will not have access to the system (no user account).
- Click Create Account to add the employee and open a user account right away (access to the system). This needs an Email and exactly one Role (the permission level). If you pick more than one role, the dialog asks you to choose just one. The account can also be opened later, so this step is optional.
Want to open the account later, or need the full account options (Standard vs Manual password, kiosk)? See Create a user account.
6. Fix anything highlighted in red
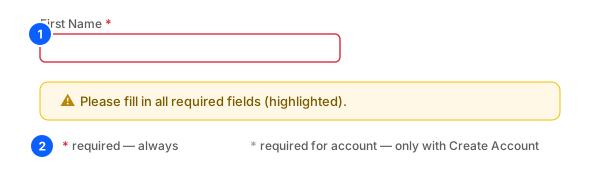
- If a required field is empty, it gets a red outline and a message asks you to fill it. Complete those fields and save again.
- Markers: * required is always needed; * required for account only matters when you use Create Account.