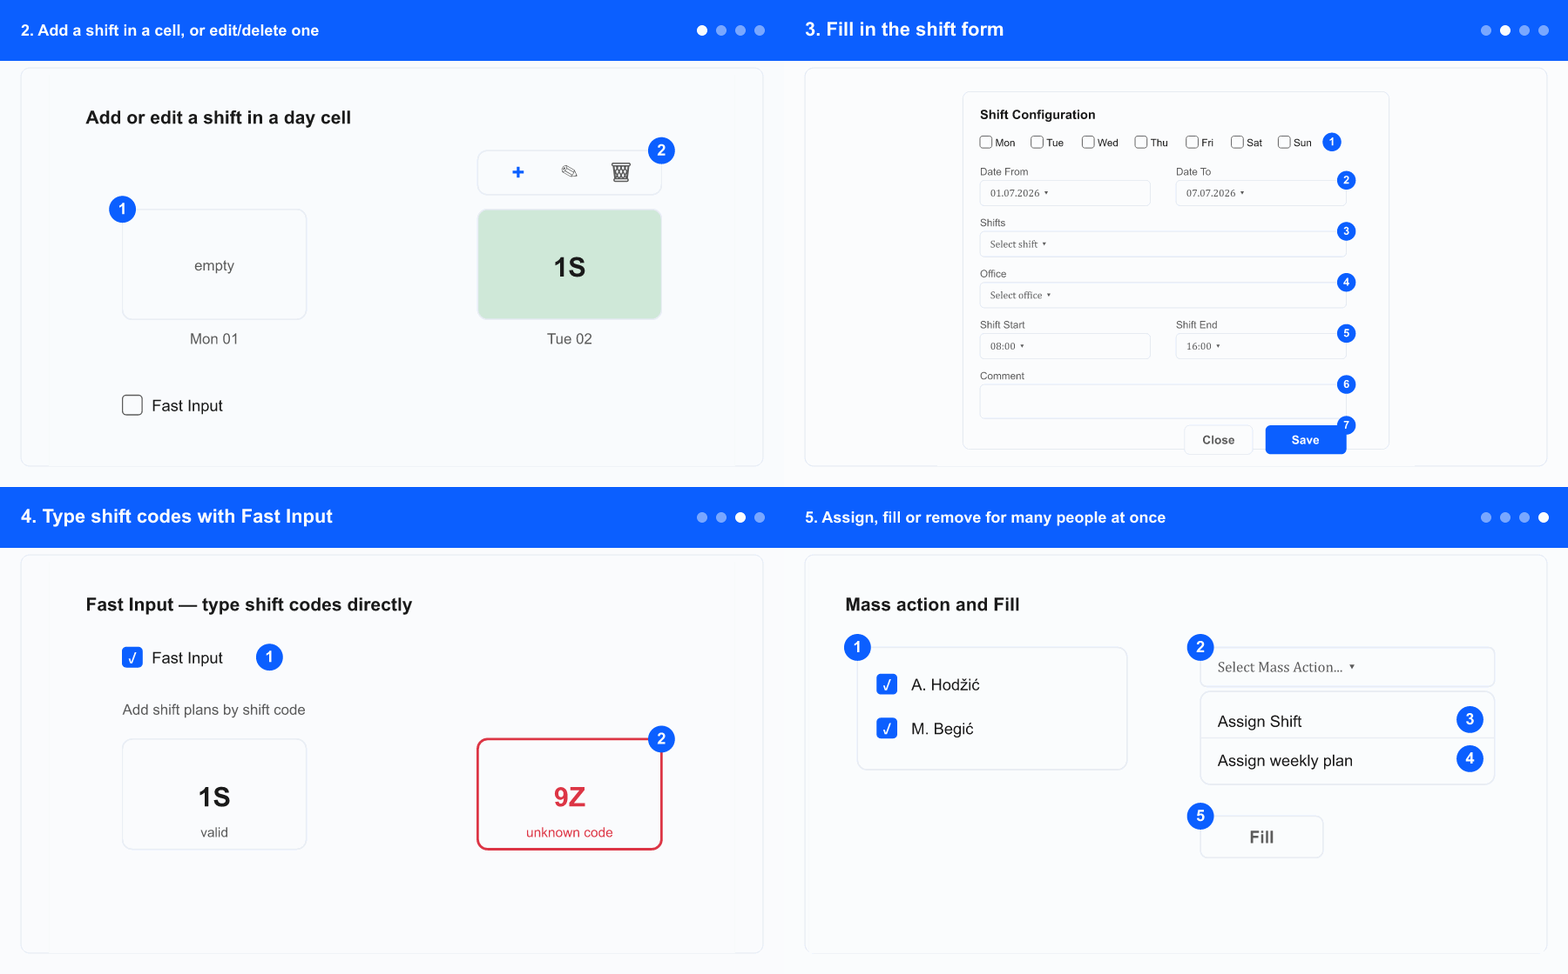
How to put shifts on the plan for your team: add one in a cell, edit or delete it, type codes quickly with Fast Input, or assign in bulk to many people at once. For opening the screen, views, filters and the legend, see the Shift planning overview. You need shift add/edit/delete permission for these actions.
The whole flow at a glance (loops). Each step below explains one part.
1. Open Shift Planning
In the left menu, open the ADM tab (if shown), then the Shift Planning group, and select Shift Planning.
Choose the month (or week) and use Search to load the people you plan for. See the overview for filters.
2. Add a shift in a cell, or edit/delete one
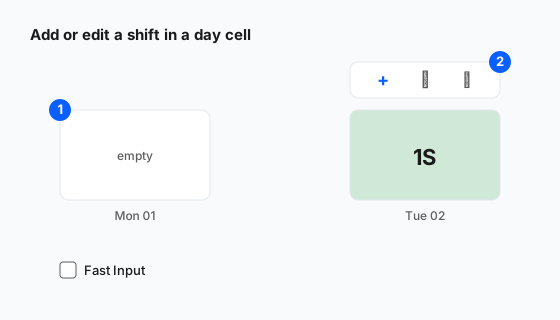
① click an empty cell to add · ② on a shift, the small menu offers add (+), edit (pencil) and delete (trash).
With Fast Input turned off, click an empty day cell for an employee — the shift form opens ready to add.
Click an existing (coloured) shift to show its small menu: + add, pencil edit, trash delete.
Choosing delete asks you to confirm (Delete Shift Plan) before the shift is removed.
On a locked day the cell can't be edited — see Lock shift days.
3. Fill in the shift form
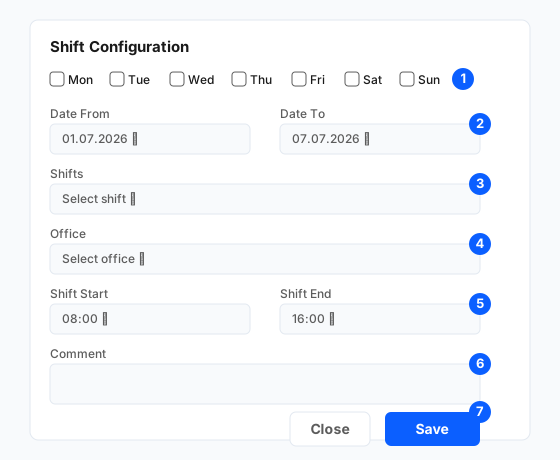
① skip days · ② Date From / Date To · ③ Shifts · ④ Office · ⑤ Shift Start / End · ⑥ Comment · ⑦ Save.
For a range, tick days under Select days you want to skip so no shift is created on those weekdays.
Set Date From and Date To (a single day uses the same date).
Pick the shift under Shifts, and an Office if relevant.
Set Shift Start / Shift End when the times are shown (for hourly detail or overtime shifts).
Add a Comment. Some shifts require it — the field is then marked Comment* (Required) and you can't save until it's filled.
If any chosen dates are locked, a warning lists those ranges (those days are skipped). Click Save.
4. Type shift codes with Fast Input
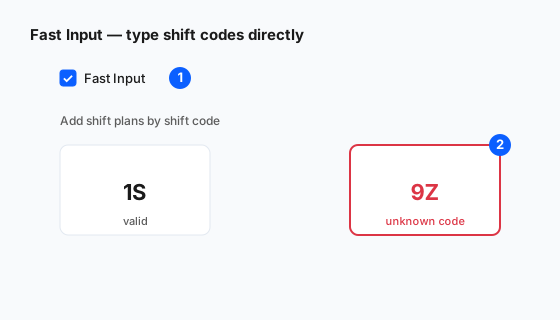
① turn on Fast Input · ② type the shift code into the cell.
Tick Fast Input (the hint reads Add shift plans by shift code).
Click a cell and type the shift's code, then move on — the cell fills with that shift's colour.
An unknown code shows a red border and a message that no shift configuration has that code. Copy codes from the legend's Copy Shift Code icon if unsure.
5. Assign, fill or remove for many people at once
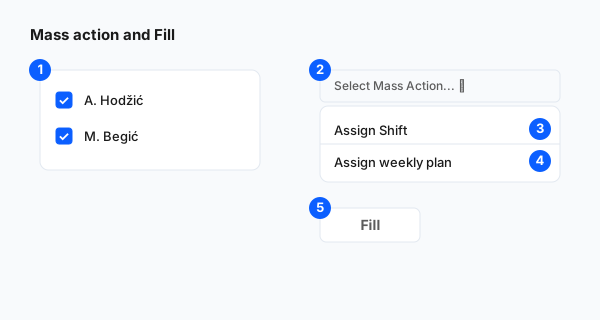
① tick employees · ② open Select Mass Action · ③ Assign Shift · ④ Assign weekly plan · ⑤ Fill.
Tick the employees in the left column. The mass-action button is disabled until at least one is selected (hint: Select employee(s) to apply mass action).
Open Select Mass Action and choose Assign Shift — the same shift form opens and applies to everyone selected.
Choose Assign weekly plan to apply an automated weekly pattern (select at least one employee first); those shifts show a robot icon.
Use Fill (Popuni) to extend or copy shifts forward; the list refreshes when it finishes.
To clear shifts, open Select Mass Action → Remove all by shift type, pick the date range (same month), tick the shift types, add an optional comment and confirm with Delete.